Do you have a VPN active? If yes, be sure to perform the VPN configuration steps at the end.
Under the most common configurations, Web Performance software will automatically detect and configure the default browser for your platform (IE on Windows). When it does not, or the configuration is unusual, it may be necessary to configure the browser manually.
It may be possible to simply adjust the automatically detected browser settings in the Browser Settings and Proxy Settings preference pages. Additionally, unsupported browsers may be configured using those same preference pages. If this is not successful, then a fully manual configuration may be necessary. The following steps illustrate the process for IE and Firefox.
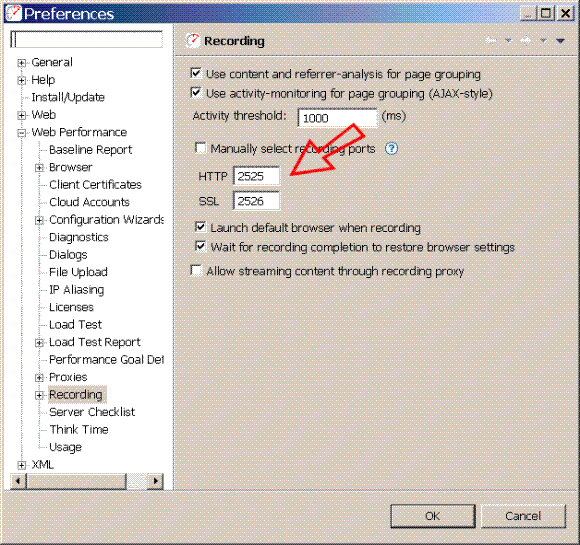
In order to manually configure the browser, Analyzer's internal recording proxy
must be configured to use fixed port numbers (it normally chooses them automatically).

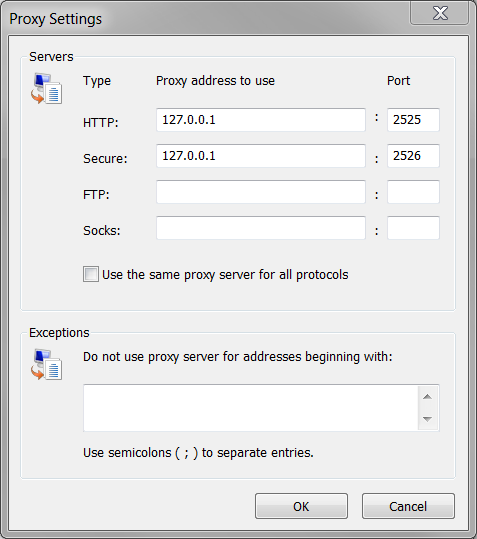
The browser must now be configured to use the selected ports.
The following browsers by default respect the Windows systemwide proxy settomgs:
For other browsers, these instructions can be loosely followed, but settings must be applied to the specific browser. Consult the browser documentation where required.
WARNING: these configuration changes will prohibit normal browsing when the Web Performance software is not running. These changes will need to be reversed to resume normal browsing. Be sure to write down or backup your settings to ensure they can be restored correctly.
Most browsers, will use Windows Systemwide Proxy Settings by default.
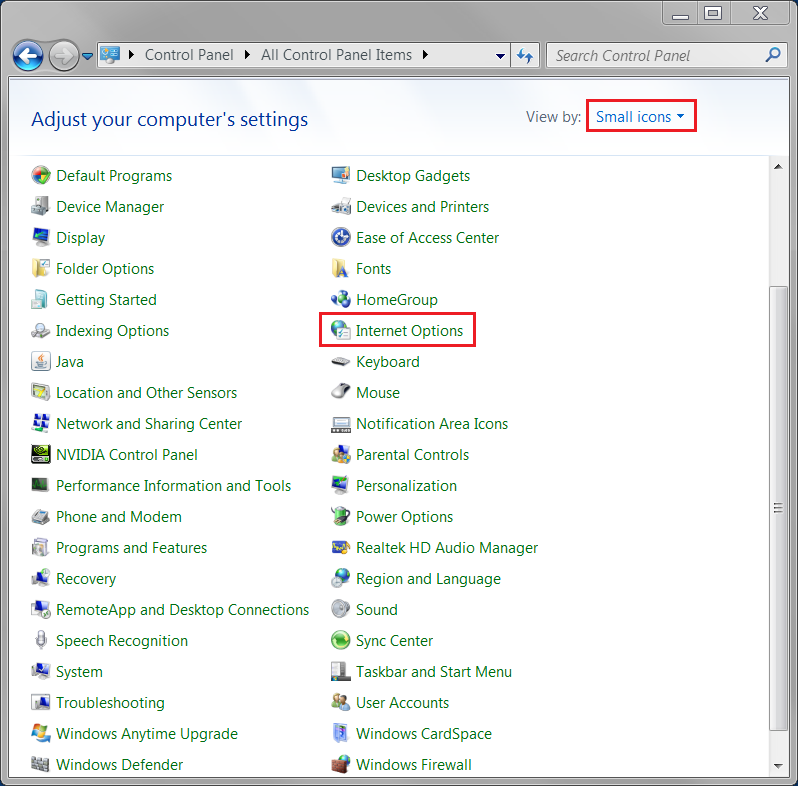
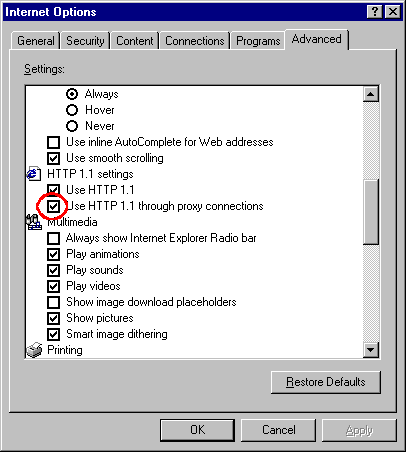
The final step in the browser configuration is to configure the HTTP connection for the browser for a proxy using the Advanced tab of the same Options Dialog. Make sure that the Use HTTP 1.1 through proxy connections option is turned ON.
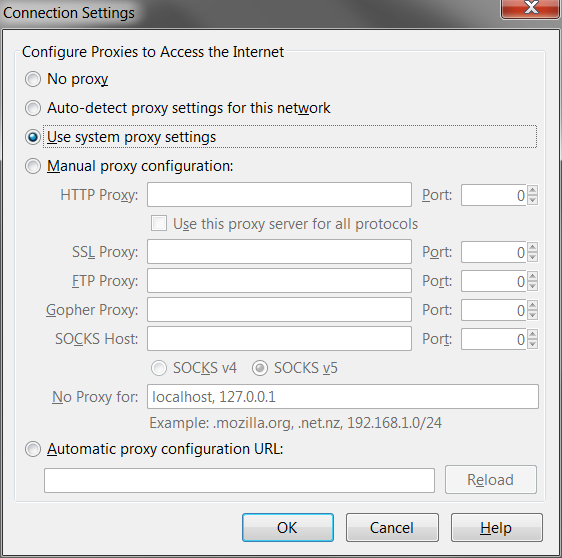
Newer versions of Firefox use Windows sytemwide proxy settings, so begin by following the instructions to configure the Windows proxy, above. Once you have done this, make sure that Firefox is actually configured to respect these settings.
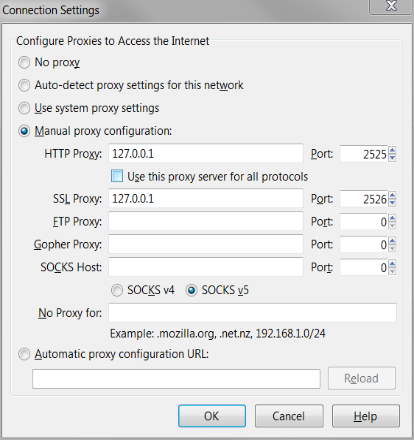
Recommendation - manually switching the proxy configuration can be cumbersome. There are several Firefox extensions that can switch between multiple proxies, available from the Firefox extensions page.
Google Chrome respects the Windows systemwide proxy settings.
Safari respects the Windows systemwide proxy settings.
The most recent version of Opera we tested does not seem to respect Windows systemwide proxy settings. If you need to record using this browser, you will need to configure Opera's proxy settings manually.
Finally, if a proxy server is required to access the applications to be recorded, it must be configured in the Proxy Settings preference page. If you do not know if a proxy is required - ask your network administrator.
When you have the necessary proxy information, use these instructions to add a new proxy configuration and make it the default setting.
After these configuration steps are finished, press the refresh button in your browser to retry the diagnostic page. If the URL of the diagnostic page is no longer in the URL field, you may enter this:
http://webperformance.com/diagnostic/proxy_check.html
The browser should display a Welcome page indicating that the configuration is successful.
If your Windows computer is connected to the internet via an ISDN modem, phone-based modem or VPN there is an extra configuration step that must be completed. Unfortunately the normal Windows network settings are ignored when the internet connection is made via these methods and there is a simple change that must be made before and after using Web Performance Analyzer™.
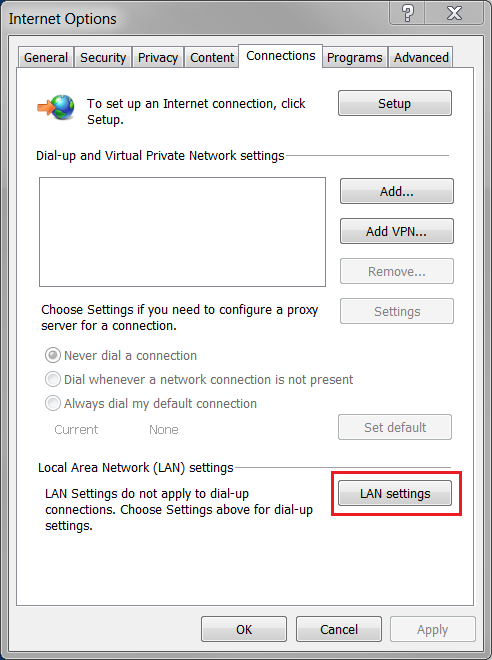
To tell if your computer requires this extra step bring up Internet Explorer and bring up the Internet Options Dialog. (select the Tools->Internet Options menu item). Click on the Connections tab to examine the network configurations:
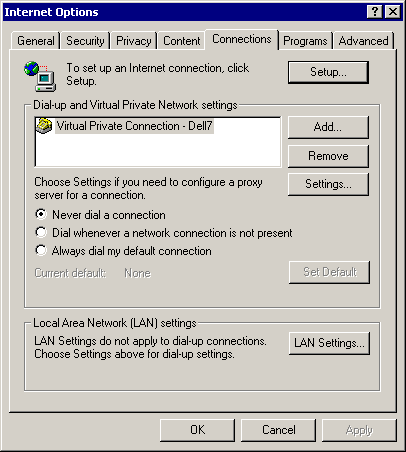
If extra configuration is needed you will see an entry in the Dial-up and Virtual Private Network settings. Select the dial-up or VPN connection you are using and push the Settings button:
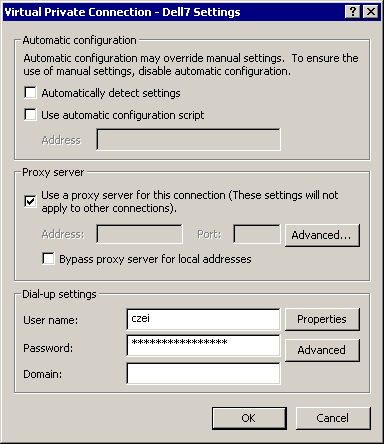
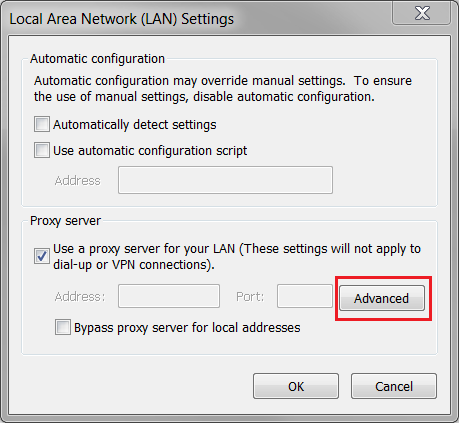
Make sure the "Use a proxy server for this connection" is checked, and then click on the Advanced button:
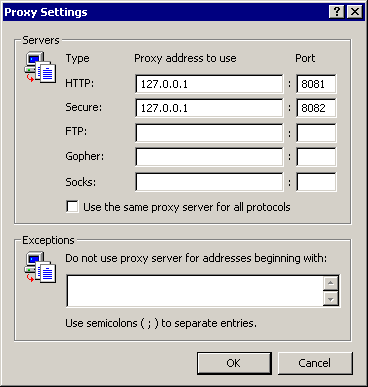
If you are using the default settings use the loopback address 127.0.0.1 and the port numbers as shown in the Web Performance Preferences, in Step 1.