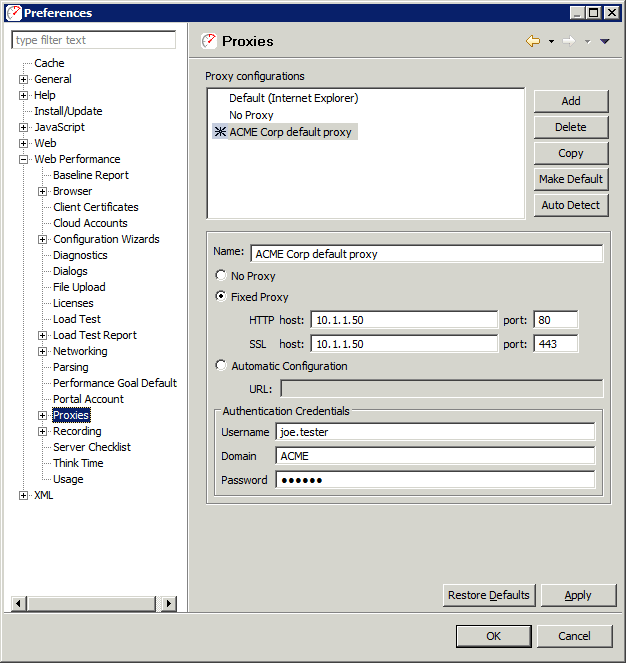
The Proxy Settings page is located in the Web Performance section of the Preferences dialog (Window->Preferences menu item). Every attempt to automatically detected the proxy settings is made by the Recording Configuration Wizard when the first recording is performed. If this step fails or an alternate proxy configuration is desired, it can be customized in the Proxy Settings page.

The default proxy is indicated by a mark (*) next to the proxy name in the list. To select a different proxy for recording, select the proxy in the list and press the Make Default button. This proxy will be automatically configured for the browser when a recording is launched.
To restore the auto detected proxy information or to detect changed proxy settings (for the computer or network), press the Auto Detect button.
To add a new proxy, press the Add button to the right of the list of proxies. Enter a valid name and proxy information in the lower right portion of the page. To save the new proxy, press the Apply button.
To copy an existing proxy setting, select the proxy in the list and press the Copy button. To save the copy, press the Apply button
To change an existing proxy, select the proxy in the list. The lower right portion of the page displays the editable information. Make the changes as needed and press the Apply button. At any time before Apply is selected, the original information can be restored by press the Restore Defaults button.
To delete a proxy, select the proxy in the list and press the Delete button. Note that at least one proxy setting must be selected as the default and it may not be deleted. If no proxy should used, select the No Proxy setting.
If your proxy server requires authentication, you may enter your default credentials here. If your proxy does not require authentication, you may leave these fields blank.