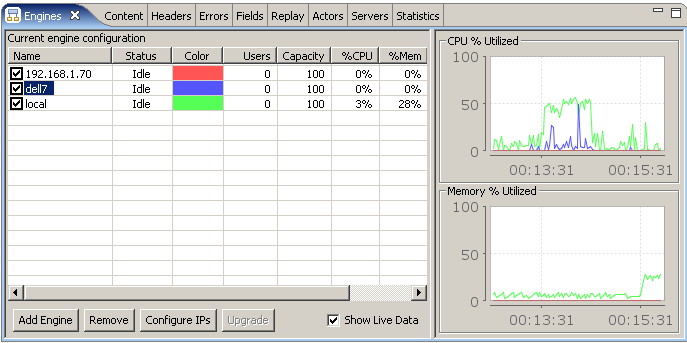
The Engines View provides configuration options for each engine that will be used during a load test. In order to connect to a load engine, you will need a test computer with the load engine software installed. For more information, please consult the Load Engines section.

For active engines ready to or actively participating in a load test, the following information is displayed:
Many times, load engines are automatically detected and displayed in this view when the application is started, or when the load engine software is started. However, in some circumstances the engine may not be added automatically, and you will want to explicitly connect to an engine. Alternatively, you may want the local engine to also participate in the load test, in addition to it's role of collecting metrics and distributing users. For either of these options you may select the Add Engine button.
In the Add Engine dialog, you may select to add the local engine (only if it is not already selected as an engine), or select a remote engine. For remote engines, you may enter either the host name or the IP address for the engine. The port number used for engine communication defaults to 1099, and should only be changed if the remote engine has been explicitly configured to use another port. Once the OK button is pressed, Load Tester will attempt to connect to the engine, and verify that the engine is suitable for testing before adding it.
If you receive an error attempting to add an engine that is known to be running, then it may be necessary to configure any firewalls and the engine to permit connections with the controller. For more information, please see Configuring a Load Engine.
To select an engine to use during a load test (or to monitor live), select the checkbox next to the engine name. To disable an engine - un-check. Only those engines which are checked will be used during a load test. When selected, Load tester will attempt to verify that the engine is available for testing, and enable it if so.
Engines may also be removed entirely from the engine list by pressing the Remove button. Once an engine has been removed, it may be added back automatically if it or the controller is restarted.
If the engine is using a different software version, it cannot be enabled. If the software version of the engine is lower, selecting the engine will enable the Upgrade button. Press it to upgrade the software on the engine. Once the upgrade process has completed, the remote engine software will need to be restarted in order for the upgrade to take affect.
For engines which support using multiple IP addresses, it is possible to configure which IP addresses the engine will use during a load test. To do this, select an enabled engine, and press the Configure IPs button. A dialog will be displayed allowing you to configure the IP Aliasing settings for the engine.
After a test has completed, selecting the test results will display the saved engine metrics from the selected test. Only the relevant columns will be displayed for historical data - which means none of the columns which show "live" data will be displayed.
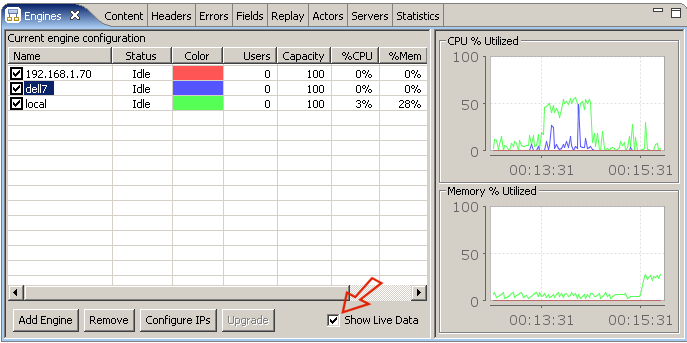
Note that the live data option must be de-selected to view historical results:
