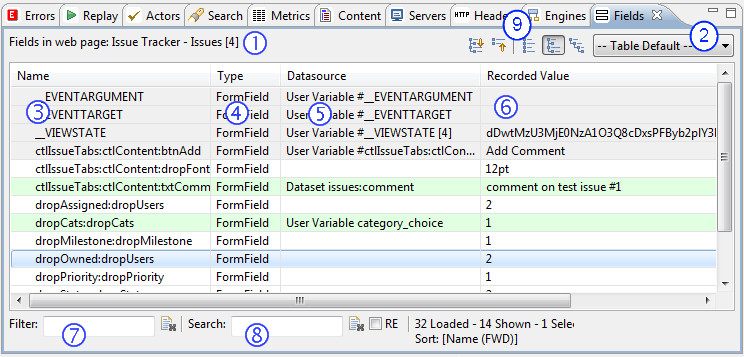
The Fields View displays the form fields, URL query parameters, multipart content, and file uploads (from form fields) found in the item selected in the Navigator View or Testcase Editor. The Fields View can be opened from the menu Window->Show View->Fields.
Each row represents a field sent in a request. White rows indicate fields that will be replayed exactly as recorded. Green rows indicate fields that have been customized by a user and grey fields have been customized by one of Load Tester's automatic configurators (e.g. ASM). The blue row indicates the current selection.
The most commonly used columns are shown here. Additional columns may be shown via the customize dialog, which is accessible from the pop-up menu (Table Customization...) or the customization selector (see #2 below).
Fields can be filtered by entering the text in the filter field (#7, above) or in the Customize Dialog. Column-specific filters can also be configured in the Customize Dialog or by picking Filter by Column from the pop-up menu.
The field hierarchy mode buttons allow you to choose from a flat, full and abbreviated hierarchy modes. The default mode is the abbreviated hierarchy, which shows each field that meets the filter criteria and all children of that field. The flat mode displays all fields that meet the filter criteria in a list - sub-fields appear as separate fields unrelated to their parent fields. The full hierarchy shows the structure of the entire transaction down to each field that meets the filter criteria and all sub-fields below. Note that if no fields in a transaction meet the filter criteria then the transaction will not appear. In many cases, the full hierarchy mode is most useful with the field-type filter turned off. The expand and collapse all buttons quickly reveal or hide the full structure of the fields.
The fields can be sorted by a single column by clicking on the header of the column. Click again to reverse the sort order. Multi-column sorting can be configured in the Customize Dialog.
Drag the column headers to re-order the columns. Column order and visibility can also be configured in the Customize Dialog.
The table can be customized via the Customize Dialog, which can be opened from the last entry in the Customization selector or by choosing the Table Customization option in the pop-up menu.
To save a customiztion for future use

To locate the transaction containing a field, select the field in the Fields View and press the Display in Editor button. The corresponding transaction is then selected in the Testcase Editor.
To change the constant value or configure modifiers on fields, the Field Edit Dialog can be opened by selecting one or more fields and:
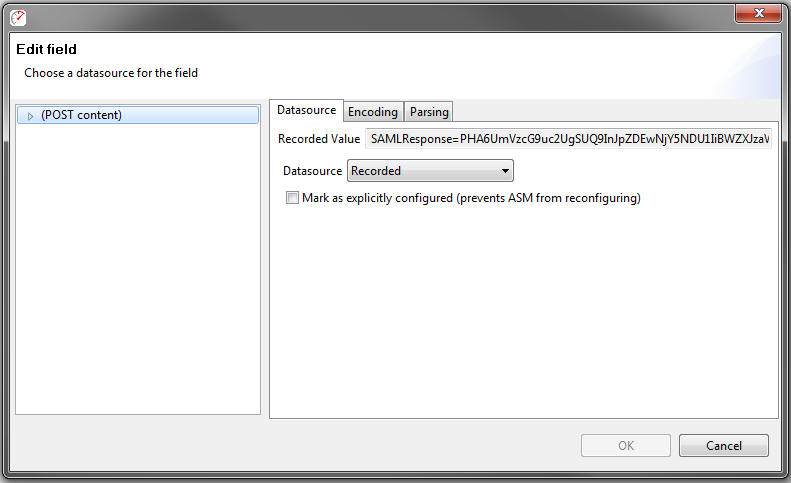
If multiple fields are selected, they will all be changed by this dialog. If they have different settings when the dialog is opened, the Recorded Value and Datasource fields will be blank if the selected fields do not all have the same setting.
The value sent to the server for a field may be changed by selecting a different Datasource for the field. Depending on the datasource selected, the editor below the datasource chooser will provide the options for that source.
Notice that for named fields, the name or the value can be reconfigured, in addition to the entire field. By default when the dialog is opened, the value of the field will be selected for configuration. The tree at the left follows the same color scheme as the Field View to indicate how a field is configured.
For more information on using modifiers to customize a testcase, see the Customizing a Testcase section.
The Fields View uses a variety of rules, called "Parsers," to decide what fields should be generated. You can individually cherry-pick a parser for any given field by modifying the field or fields under the "Parsing" tab of the field edit dialog box. Choosing a parser for a field will cause that field to be broken into expandable sub-fields. For example, the regular-expression parser breaks out a separate field for each string that matches the regular expression you provide.
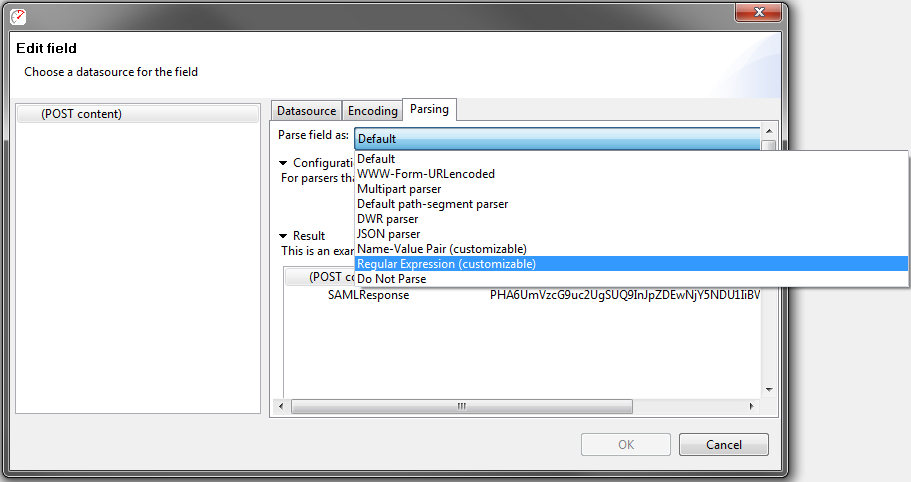
In some cases, if it cannot understand the recorded content within a field, a Parser will fail. This is not harmful; the consequence is simply that no sub-field will created for that Parser on that Field.
The Fields View now has great flexibility in filtering, selecting and editing multiple fields at a time. The following example shows how to filter the fields to show only the Host:port fields for a subset group of transactions in a testcase and then edit them as a group.
First, we will select the Fields View and then in the Navigator, select the testcase. The Fields View will now be showing all instances of the default field types in the entire testcase. The host:port fields are not shown by default. To show them, we must customize the view. First, select the customization chooser, shown below.
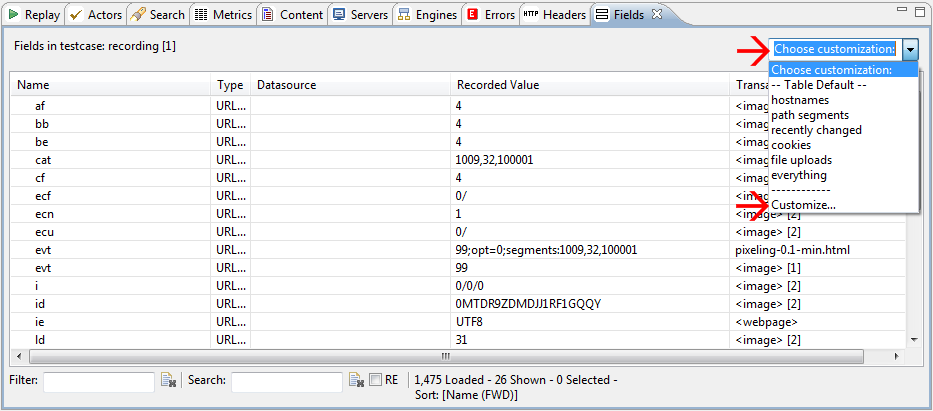
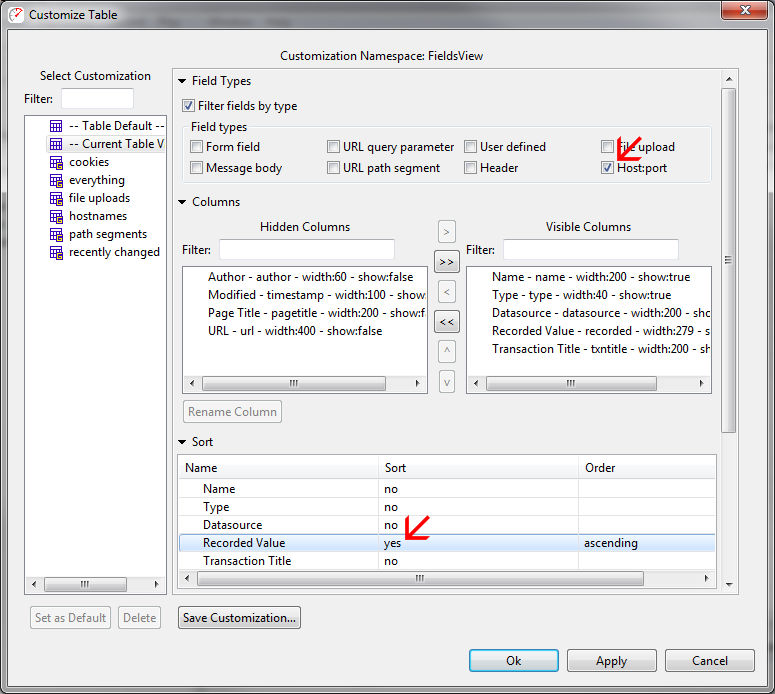
Because reconfiguring hostnames is somewhat common, there is a customization pre-configured for this purpose (the hostnames entry in the list). However, in order to demonstrate the process, this section will describe how to manually configure a customization for this purpose. Choose the Customize... option from the list to open the customization dialog. In the Field Types section turn off the default selections and turn on the Host:port field type. Then in the Sort section, turn off sorting by Name and turn it on for Recorded Value - to sort the fields by the recorded host name. Before accepting the changes, the dialog should look like this:
After accepting this result, the Fields View should now show look roughly like this, depending on the hosts present in your testcase:
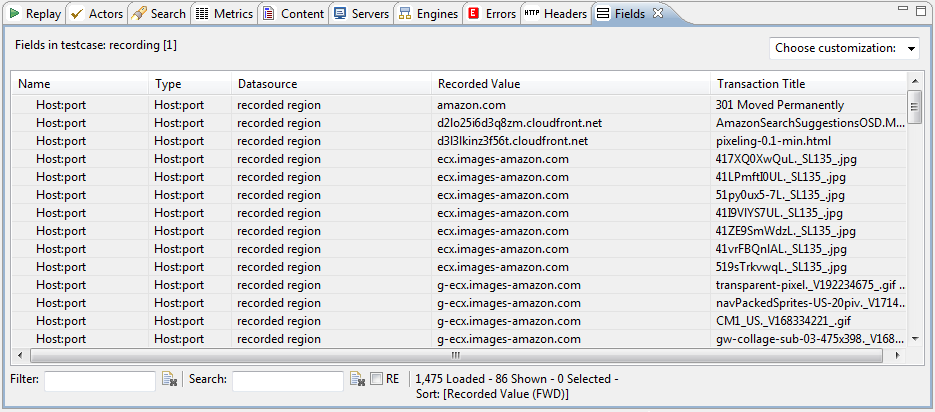
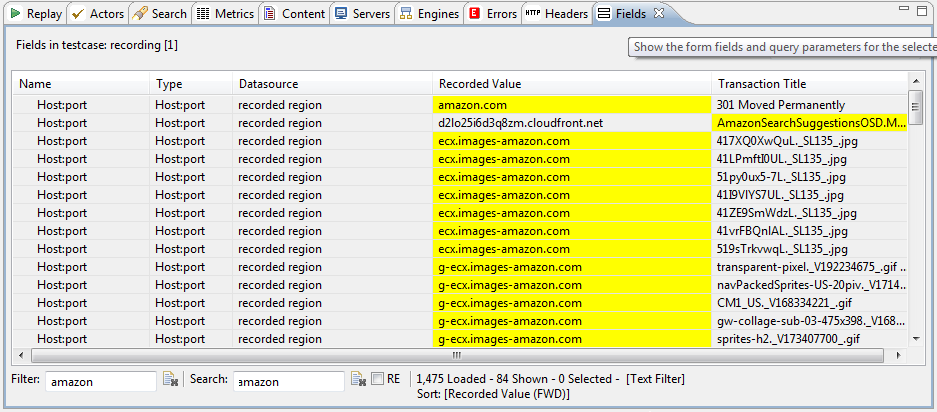
It is now easy to select, for example, all the fields for hostname "ecx.images-amazon.com" using the Shift key and the mouse. For more complex changes, the filter field can be used to further refine the results shown in the fields view. For example, to change all hosts with "amazon" in the name, enter "amazon" in the filter field. In this example, however, the results are not exactly correct. In this screenshot, the view is filtered by amazon, but the second row has a field without "amazon" in the hostname. This is because the filter field looks for the filter text in all columns. By searching for the same text, the cells containing the text are highlighted in yellow, showing the cell that caused the confusion:
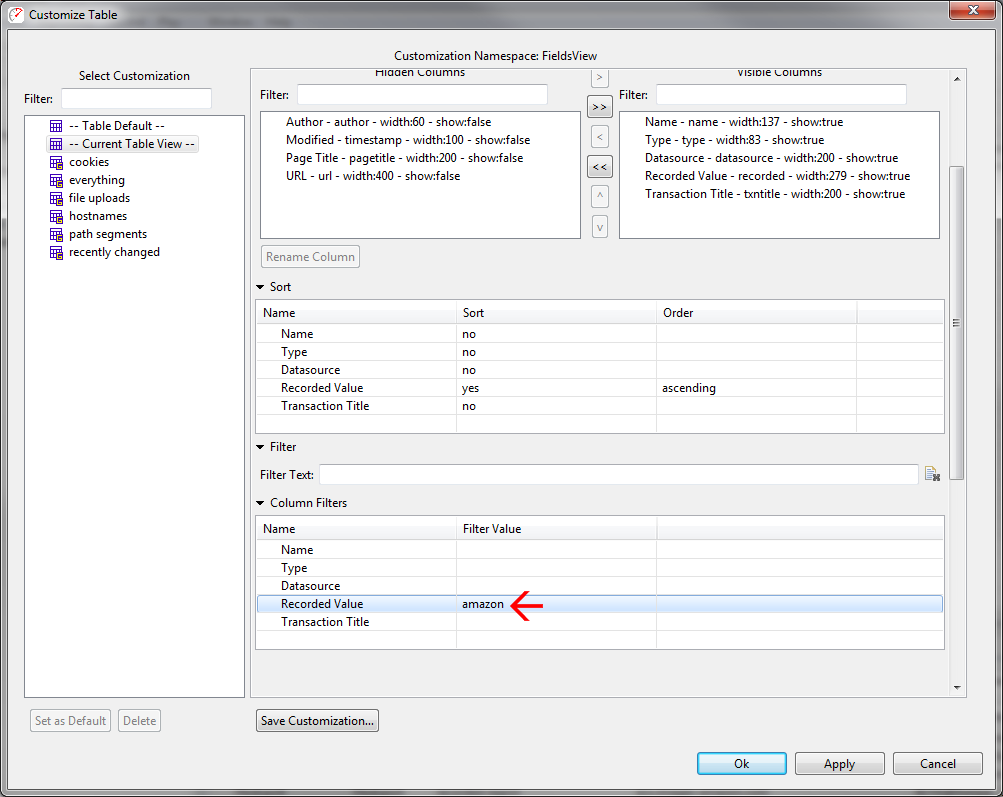
To solve this, the filter could either be revised to "amazon.com". Alternatively, a per-column filter can be configured instead. This can be done either from the Filter By Column option in the pop-up menu or in the customization dialog. Both methods achieve the same result. Here is the customize dialog with the added configuration to filter for "amazon" in the recorded value column:
The Fields View will now show only those hostnames with "amazon" in them. The fields can then be multi-selected (ctrl-A to select all) and edited (choose Edit... from the pop-up menu). The Field Editor dialog will appear:
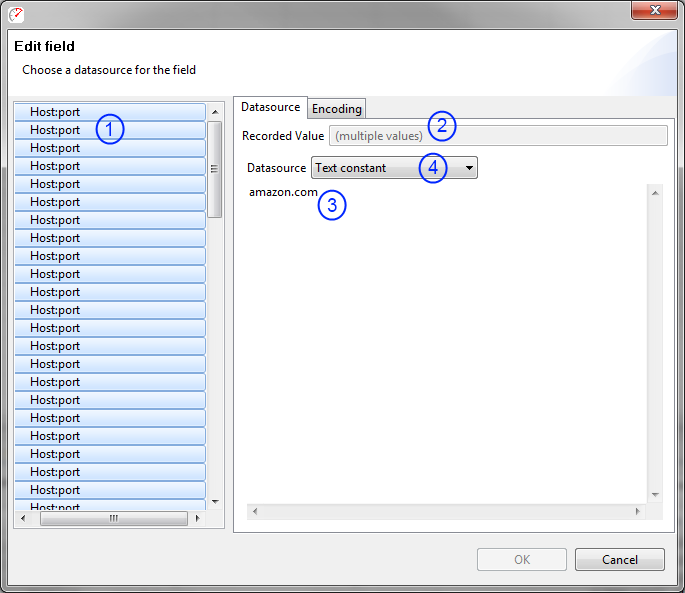
Each of the host-port fields will appear on the left (1) and all will be initially selected. The options on the right will reflect that selection. In this example the selected fields have more than one value, so the Recorded Value field indicates that condition (2). To change all the values to another single value, simply edit the text (3). To configure, for example, the field names to be determined dynamically at runtime based on a pre-configured dataset, choose the Dataset type from the Datasource chooser (4).
Note in the picture of the Customization dialog earlier in this page there is a Save Customization... button. This allows the current configuration to be saved for later use. It will then appear in the Customization drop-down list in the Fields view. It can be further customized by choosing it in the left-hand list in the Customization dialog and re-saving it.